Sunday, January 15, 2012

Maria 9mm pistol Update


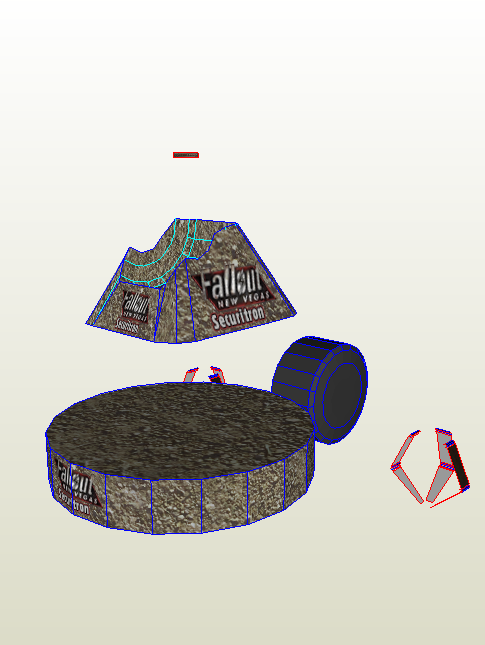
Been about a year now sense I started this and after a long break from it I am starting it back up.To tell you the truth I forgot about it for a while lol. I edited it in SketchUp with not much 3d modeling skill but sense I have been addicted to Blender all that has changed. I have edited the model more and make it easier to build. Finishing up the unfold right now. There is a few spots where the texture has been stretched so wont be perfect but shouldnt be that much of a problem.As far as life size goes Im not too sure I got it exactly right but tried my best so after test build we will know. If someone wants to test build this soon that would be great. I am building something else right now so dont have the time right a way and the sooner we get someone to test build the sooner it can be released for everyone to enjoy.

Saturday, December 10, 2011

Giant's Toe from The Elder Scrolls V: Skyrim

Here is a model of the Giant's Toe. More Skyrim models to come. This wasnt too hard to build. Still took a little while to build though. Its around 5-5 1/2 inches long. Tried to make it the best life size as I could. Had to guess on that. I started with both pieces of the nail first and worked my way from there. Not sure if its my printer or what but color comes out kinda muddy. Could be the texture or my printer not sure. If someone prints this let me know if the color comes out well for you if you can thanks.

 Model ripped by Paperjon and unfolded/test build by me.

Download here: http://csfgpapercraft.com/wp/?p=623


.

Tuesday, October 25, 2011

Pip-Boy 3000 Update


Started the build on this and redid size. I tried to get the size the best I could for life size so I just hope everything turns out good. Might be slightly too big but better than to small I would think. Wasted a lot of test paper on this on getting the right size and also having trouble with my printer. Not sure what it is but it always prints Fallout models really dark and muddy. So I did something I never do and I printed a .pdf of it. Turned out a little better. So keep in mind when you see the final test photo that yours will probably turn out better if you choose to build this.
it has 54 parts and 12 pages. Not that bad considering I simplified it a lot.

Monday, October 10, 2011

Pip-Boy 3000 unfold is complete


Just got the unfold done this morning and getting ready to print. hope everything goes good on the test build. The part that scares me the most in the large inside parts. Just hope it wont give me trouble. Really you dont have to include it if u dont want to. If your looking for a exact version from the game well sorry. I have done retopology as mentioned in my other posts to make less polys so its easier to build. Still tried to keep it somewhat the same.

Update: Printed it but ran out of cardstock. Need 3 more pages and Im broke. Might be a little longer now. Also the print turned out pretty dark. Not that big of deal sense Im testing the build and not the color but keep that in mind when u see the final photo of it. My printer sucks at printing Fallout textures I swear lol.

Friday, September 23, 2011

Suzanne from Blender done and released!


 ( Text copied from what I typed at Blender Artist  cus Im lazying I guess.)
This is a papercraft model I did of Suzanne because shes a cool monkey and its Blender.
I wanted to keep the model exact as I could to the model already in Blender. Only thing I edited was around the eyes sense the model needs to be a single mesh(non-manifold I think its called) for making it into paper. I then used Pepakura Designer to unfold and build with cardstock.
All the small parts and closing it off was tricky. This model took me a while to build. Main hard thing was inside of the ears. I may show photos of what I mean exactly so it can help anyone that wants to build it.
Have included different textures so u can change the color or if you like you can import your own texture over it. If you need help just ask:)
I  can make a simple version if anyone likes also. Want a different size I can do that as well. You can print from the .pdfs for get Pepakura Viewer Here for free. Any questions ask below.
Watch video of me holding Suzanne if you like above or here http://www.youtube.com/watch?v=-WBGxLB2NEg
Pretty much did that for fun. My digital camera kinda sucks sorry.

Download the model template Here

Wednesday, September 14, 2011

Working on Batmobile


Started to do the retopolgy on the Batmobile that will soon be a papercraft:)
Update on everything else. Suzanne Blender model is almost done being test build and then I'll work on the Pip-boy.

Friday, August 26, 2011

Fallout Pipboy 3000 done editing!!


I love this topology method!! Got this model done in one day and with all the techniques I've been learning I should have lots more good stuff on the way now.

Thursday, August 25, 2011

Pipboy 3000 in the works using retopology

I'm just starting to learn retopology. Working with it on the pipboy so hopefully I can finally finish this. What Im doing is creating my own faces over the model and I will then bake the textures from the original model onto mine.Doing it this way I can create the faces on how I want the model while keeping it a single mesh for papercrafting. I'll keep updates on this.

Thursday, August 4, 2011

Fallout model - Securitron complete !!!

 Go here to download
Its done!! Will be uploaded onto teams site very soon.Any question just ask
below. All texture screens and rusty/clean body included so if you need help changing texture just ask.
Thanks to Wackett for the test build and both paperjons and Wackett for help with the unfold.

Friday, July 15, 2011

Securitron almost ready to be tested!!


Paperjon at CSFG is unfolding it for me right now. just wanted to explain a few things. First I wanted to say this will have to be somewhat big otherwise you could  have some real trouble. I've included the rusty and clean body(frame) texture. Lots of screens to choose from also. 17 screens to be exact lol including alert and neutral screens. Also I have a what I'm calling just "Extra" pdo. I have 2 bases you can choose from. One harder than the other. Also things that are simple like the claws in case the detailed version of them is to hard to make becuase of its size or if u just choose the simple way. Included a slightly scaled down wheel. This is just for support. Not sure if its needed but thought I would add it in case the body weights too much for it. Probally not but have it in there anyways. Any question just ask below.

Friday, July 1, 2011

New Release! Mega Man X8!!

Mega Man is done! WTHenry requested this at the CSFG forum so I decided to edit and unfold this model. He was the test builder also. What I did was take the higher poly version and made it low poly by using the decimate modifier and then bake the textures onto the low poly version. Then with many hours of editing and using the Boolean modifier and also merging a lot of verts one by one got it done. I know someone has already released something similar not to long ago but mine is simplified and cleaned really good. No red lines(except where there is suppose to be open edges).
Download Here

Thursday, June 30, 2011

Securitron from Fallout Almost done!

Its all ready to be build. Just got to fix the texture. Add screen textures and fix a panel. All can be done in Photoshop and shouldn't take too long. I might be making a base for him so will take a little longer. At least the hard part is over. I also have a few parts that I have simplified a lot on a different pdo. Like his hands so that if u choose you can make very simple versions. Hard to explain unless u see it yourself. Also I duplicated the wheel, scaled it down just a little and made the texture grey. The reason is for just in case the wheel doesn't support the weight of everything else. Should be ready real soon!

Saturday, June 25, 2011

New Project - Securitron from Fallout New Vegas

Working on this right now and its coming along nicely. Arms and shoulders are done so far for the most part. Made 2 versions of the claw finger things. One version is simple and the other will be harder to build but look nicer. I tried working on this model months ago but that was when I only knew how to use SketchUp and didnt know much. There will be no red lines, really clean and I am simplifying this model but not so much that it wont have detail or anything. Will be making it so u can change the screen textures also sense there is different screens. Victor for example. Hope its something that people will like. I think I'll be making the Pipboy next finally. I understand how I can fix it now by merging parts of the mesh so will be really cool.

Friday, June 17, 2011

Hellraiser Puzzle Box Toy

First I would like to thank TomVDJ over at The RPF for the lament configuration panels. They were very high quality.
I have been a Hellraiser fan sense I was a little kid and even though there is some bad ones out there its still awesome to watch.The first Hellraiser is the best in my opinion.
Not sure if I got the panels to match exactly like the movie but if someone figures it out let me know. I tried my best to match it by going through the whole movie and taking screencaps of every frame with the box in it. Its not that big a deal to most people though. Made the texture in Photoshop and my Photoshop skills aren't the best so sorry if it doesn't meet your standards lol. Let me now what you think or if you need any help. No the lament box doesn't have moving parts. Just a box with textures but I might be making one with moving parts like in the movies.

Blender 2.5 Making a model low poly and baking textures onto it.

Might be better to watch right from youtube so u can watch in full screen. http://youtu.be/eeFnPg4YRbE
A video tutorial on making your models have less polys so they are easier to build. Sometimes the textures will need some fixing so keep that in mind.
I didnt capture my mouse but you should be able to follow this tutorial fine. Sorry I got the new SnagIt and yup no curor showed for the video. Wont happen again.
I'm just learning all this so there may be a easier or better way of doing this tutorial. I made this to explain how I do it:)
The original model's parts all have to be joined together. In Object mode press "A" key and press Ctrl + J to join them all.
The model might get a error while trying to use the decimate modifier. Something like your model is a non-manifold or something. Make sure the model is a clean mess. Try to have no internal geometry, no 2 sided face(I think). Press Shift + Ctrl + Alt + M to see non-manifolds. Try and fix it if you can if thats the reason why the decimate isnt working.Try and merge if u can.
Most of all make sure to remove doubles.
You need to be in GLSL shading with a lamp when baking. As far as I know anyways.
Thats all I can think of for now.